Jonathan Coco, Forte & Tablada — Advanced Measurements and Modeling for Forte & Tablada Engineering Consultants of Baton Rouge, LA. specializing in cutting-edge methods and outside-the-box solutions for a wide range of disciplines.
If there is one thing I have learned from 3D scanning, it is to expect anything!
Over time, we have been asked to scan a wide variety of things for so many different reasons that our perception of 3D scanning’s boundaries have expanded. These days we expect to scan almost anything that needs to be scanned (and some things that do not). Still, sometimes an opportunity comes out of nowhere: a random email from a client asked for a mesh or 3D model that could be used like a dressmaking form for designing a special bra. This bra would be worn by a model and then auctioned off at a breast cancer awareness event in the near future.
The idea was to measure a model’s bust here and digitally design the bra hundreds of miles away at another office. I’m not one to shy away from unusual challenges, so we were quick to extend our help, particularly as this was for a good cause. We had a number of devices and techniques at our disposal but ultimately decided on the FARO Freestyle and an Asus Xtion paired with Skanect. I’ll explain why.
The Equipment We Used
Photogrammetry is an obvious candidate here, as it is used quite successfully for this type of application in VFX, gaming, forensics, and more. We are not equipped with a multi-camera rig that could take all the pictures simultaneously, and the idea of taking a few dozen images one at a time with a single camera while the live model held perfectly still would be difficult and awkward in many ways. I also did not like that I would be unable to review photogrammetric reconstruction results immediately. If the reconstruction failed, repeating the scan potentially days later was not an option, as the client needed the mesh the next day. We also considered using our FARO Focus 120s at a high quality setting, but even at a very low resolution that process would involve at least half a dozen scans to adequately capture all surfaces, and I doubt the live model would have tolerated sitting still for the duration. Using the Freestyle and the Xtion, each scan would only take about a minute and the final results would be almost instantly available for review.
 The Scan Process
To set up for the scan, we cleared the area in our office so that there was plenty of walking space but left much of the clutter in the surrounding area to act as feature points for devices to use for alignment of frames. We also turned on every light in the room and positioned three 24” LED strip lights on the floor around a stool to provide up-lighting. Prior to the scan I instructed the model to sit very still and hold a T-pose with arms bent up at the elbow to facilitate the path I intended to walk and to allow close positioning for optimal scan density. The scanner’s path was actually sinusoidal at about a 45-degree angle as I walked the circle to cover over and under all surfaces.
Processing Steps
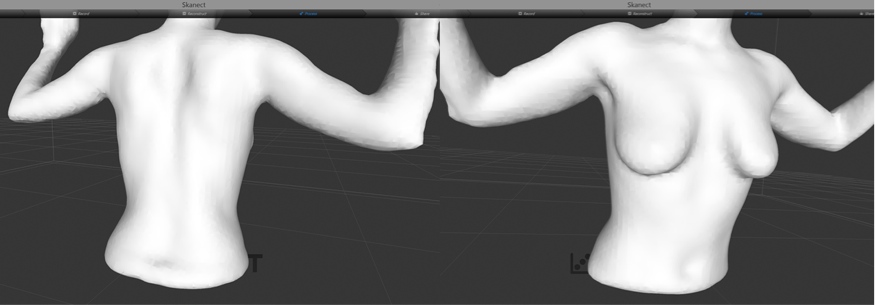
The results using the Xtion in Skanect were modest, as the limiting factor was the sensor. However, the final results in post processing were very quick to obtain. Just a handful of clicks were necessary to crop the legs, close holes, add color texture, and export in the correct units. No texture is shown here, but I can tell you that it was obfuscated in many areas. It reminded me more of a mesh created from vertex color rather than a high-resolution image mosaic.
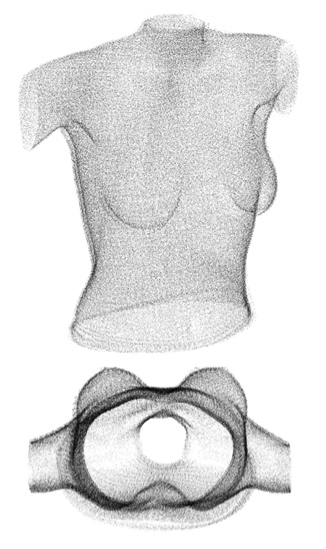
Processing to final state with the Freestyle was not so easy, but the accuracy and density were definitely superior. During the scan with the Freestyle the model moved slightly (she even said, “Oops, I moved”), and it was apparent after final processing using Scene process that there had been some movement. After clipping and exporting the data from Scene, I quickly cleaned up the problem areas in CloudCompare using the statistical noise filter. I also attempted to compute the normals and create a mesh in CloudCompare, but I am less familiar with the workflow for success. Therefore, I ended up performing those tasks in MeshLab, which produced an excellent mesh.
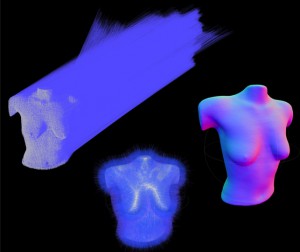
Above is the processed Freestyle data viewed in Scene without color. Below are the original normals, the computed normals, and the final mesh. There is still much for me to learn about MeshLab, but through a little trial and error these results were achieved by using the “Compute normals for point sets” filter set to a neighbor number of 1000 and Surface position. Using those normals, the Poisson Surface Reconstruction filter was used to create the final mesh at an Octree depth of 12, Solver Divide of 10, and Samples per Node of 5.
Final Deliverable
In the end I delivered both meshes to the designer with the option to use whatever mesh was preferred. I was hoping to get some decisive feedback about which mesh was better for certain reasons like texture or accuracy. In the end it was simply the small size of the Skanect mesh that was appealing to work with. My original mesh created from the Freestyle data was about 300k triangles, while the Skanect mesh was just over 30k. After speaking with the designer, I simplified the Freestyle mesh down to 60k and 10k and re-submitted, because even the reduced results were smoother and more accurate than the Skanect mesh.
This was about as strange as projects get for us, but I was glad we could contribute our small part. Aside from the brief moments of awkwardness, this entire experience was both enlightening and rewarding. I hope that when any of you have the opportunity you will not turn it down because it might be outside your sphere of normality. You may be surprised by what you learn and can apply to other projects.
For more information on the event, please check out: Foundation for Woman’s BUST Breast Cancer Bra Art Fashion Show


